As part of nesdev’s 2016 homebrew competition, I’ve been developing a game called Filthy Kitchen, a side-scrolling action platformer wherein the player gets rid of flies using a boomerang-like swatter. When doing a project like this, having a powerful toolchain is essential, especially for creating graphics. Luckily, makechr version 1.3 has a new GUI that makes it easy to turn pixel art into binary data that the NES understands. Here’s a guide on how to get started.
If you aren’t familiar with how NES graphics work, it might be helpful to read this earlier series of posts.
To begin, download makechr.exe from here. This guide will be using Windows. Although makechr is cross-platform, the GUI is currently a bit difficult to setup and run on other OS’s. If you’re brave enough, you’ll find instructions on using OSX over here.
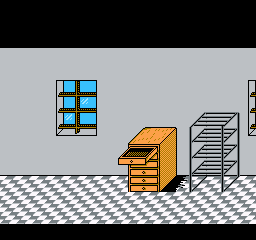
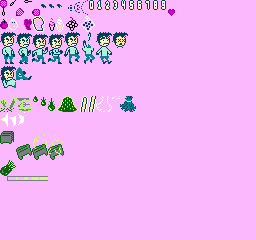
Here’s some pixel art for the background of Filthy Kitchen, as well as a sprite-sheet containing the main character and other objects. Save each of these images and put them in some convenient location.
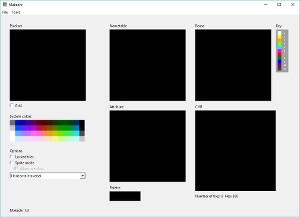
Open up makechr.exe, and you’ll see the following sight:
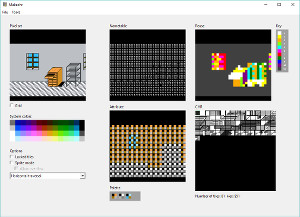
From the top menu, pick File->Open, and select level.png which was just downloaded. Once loaded, the space in the upper-left will display the original image, while the rest of the app presents some views showing how makechr sees the converted image. The “nametable”, “attribute”, “palette”, and “CHR” are all the components that make up the NES graphics, while “reuse” in the upper-right shows a useful representation of where tiles have been repeated throughout the image. Mousing over any of the views will show the corresponding data in the other views.
An especially nice feature of makechr is that the user doesn’t need to specify the image’s palette, or which blocks (16×16 pixel areas) use which colors. Instead, makechr figures out what works best on its own. If it is not possible to derive a working palette, erroneous locations will be displayed on the input image.
As an optional step, we can quickly create a ROM to see how the image will appear on the NES. From the top menu, pick Tools->Compile to ROM, and type the name “test”. This makes “test.nes”, which when run in an emulator will display the original image and nothing more. Since different emulators render slightly differently, it can be helpful to quickly verify how the art will appear.
Building from source
Let’s dig deeper though, and build a ROM from source code, using binary data created by makechr. But first, we need source code to build off of. I’ve made a minimal NES project repository; we will start with this. Retrieve it either using git, or by downloading the zip file and extracting the contents.
To compile the ROM, you’ll also need to install the assembler ca65.
If you open prologue.asm with your favorite text editor, you’ll see declarations for graphics, palette, and chr, which include binary image data directly using “.incbin”. We’ll use makechr to generate new data from the level.png image and include it in the same way.
Once again from makechr’s menu, pick Tools->Export Binaries. The filename used to save must contain the sequence “%s”, this will be replaced by the component names. Change the save name to “level.%s.dat”, which will create “level.nametable.dat”, “level.chr.dat”, etc. Copy these data files into the nes-starter directory.
Back in your code editor, with prologue.asm open, edit line 26 to be
.incbin "level.palette.dat"
Make sure to remove “build/” from the start of the path. Edit line 29 so that it includes the nametable and attributes one after the other:
.incbin "level.nametable.dat"

.incbin "level.attribute.dat"
Finally, edit line 47 so that it includes the chr data:
.incbin "level.chr.dat"
Finally, to build the ROM, run build_win.bat. If everything works, you’ll get a file called “starter.nes” which, much like the earlier “test.nes”, displays the original image and does nothing else. If something went wrong, try opening a command prompt, and run build_win.bat to see whatever error happened.
Add sprites
Makechr also can be used to build sprite data, which allows us to place additional objects in the scene. Although NES sprites work quite differently from background images, there’s enough similarity, and makechr has options to precisely control how they are handled.
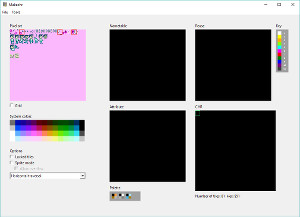
As before, open up makechr.exe, and use File->Open but this time, select the file “chars.png”. Since this image is not yet being treated as a sprite image, it will load unsuccessfully, so the other views will remain blank.
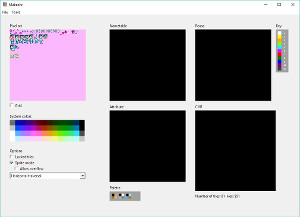
Notice that some parts of the loaded image have red squares drawn over them. These represent conversion errors. Mousing over them will display more details in the bottom of the app. In this case, the messages all start with “PaletteOverflowError”. What’s happening is that, normally for a background a single 16×16 pixel block must use a single palette. However, sprites don’t need to meet this requirement. Enable sprite mode by clicking the checkbox for “sprite mode” in the lower-left of the app.
Even with sprite mode enabled, this is still en error in the image. Mousing over it displays “SpritelistOverflowError”. This has to due with the NES’s limit on displaying sprites; though there can be 256 CHR tiles for sprites, only 64 can be used at once. This image has more than 64, but that doesn’t matter since its a sprite sheet and we don’t plan on displaying everything at once. Enable the “allow overflow” option by clicking its checkbox just below “sprite mode”.
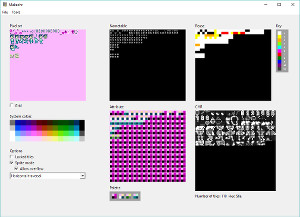
Finally the sprite image loads successfully.
There’s one final option that’s important to mention. Filthy Kitchen uses the “8×16” mode for sprites, which makes it easier to have taller characters in the game. This can be enabled by changing the dropdown that says “horizontal traversal” so instead it has “8×16 traversal”. Once this is enabled, you can observe how the CHR changes so that each object takes two locations next to each other, leaving some blank tiles where objects aren’t tall enough.
Now that the options are setup correctly, use Tools->Export Binaries to get the binary data from makechr. Save with the filename “chars.%s.dat”, which will generate “chars.chr.dat”, “chars.palette.dat”, etc. Copy these files into the nes-starter directory as well.
Open prologue.asm again. Edit line 33, replacing it with the following:
.byte $a8,$45,$01,$20,$a8,$47,$01,$28

.byte $b8,$61,$03,$20,$b8,$63,$03,$28,$ff
This will create a couple of sprites on the screen. Next, include the sprite palettes and chr by replacing line 26 with this:
.incbin "level.palette.dat", $0, $10

.incbin "chars.palette.dat", $10, $10
And replacing line 48 with this:
.incbin "level.chr.dat", $0, $1000

.incbin "chars.chr.dat", $1000, $1000
As a last step, we need to enable the 8×16 sprite mode, which requires a tiny bit of assembler. Open main.asm, and add the following lines between line 70 and 71, right before “ForeverLoop”:
lda ppu_ctrl_current

ora #PPU_CTRL_SPRITE_8x16

sta ppu_ctrl_current

sta PPU_CTRL
Run build_win.bat to compile the ROM, and opening it should look like this:
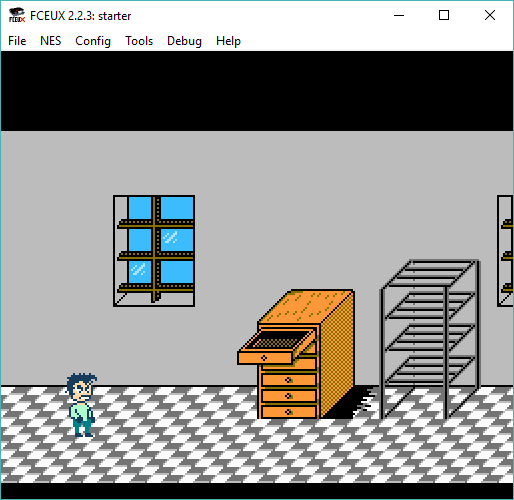
This is just the start to making a full homebrew game, but using makechr can take the pain out of generating graphics.
Leave a Reply