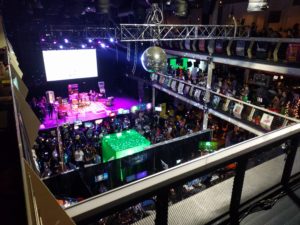
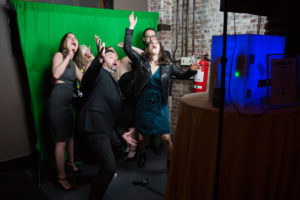
Back in August 2017, as part of Playcrafting’s “PlayNYC” event in Manhattan, I worked with DBAA to build “The Giffinator”, a green screen photo booth that creates gifs from audience members acting out scenes in front of a green backdrop. We recently had the opportunity to bring this toy to our friend’s “Weird Wedding”, for which we decided to ramp up the overall quality and presentation. What follows is some technical details about how we accomplished this.
Using a DSLR as a Webcam
The first step was working to dramatically improve image quality by switching out the old webcam with a DSLR camera. We used a Canon EOS T2I, which is notable for its solid linux support. Getting video from the camera was a little tricky, but not too difficult thanks to the help of blog writeups and various forum posts. It still took some work to figure out, as many of the posts were rather old, a bit out of date, or just didn’t work for my setup.
The ingredients are:
v4l2loopback – A kernel module for creating a virtual webcam device from an arbitrary video stream. Part of the Video for Linux (v4l) suite.
gphoto2 – A toolkit for communicating with supported DSLR cameras.
ffmpeg – The swiss army knife of linux video manipulation. It does everything.
Optionally:
cheese – An open source clone of OSX’s Photo Booth software, useful for testing the setup, but not necessary for the final product.
Installing the requirements:
sudo apt-get install v4l2loopback-utils gphoto2 ffmpeg cheese
It may be necessary to add your user to the video user group in order to create video devices:
sudo usermod -aG <your_username> video
Once that’s done, plug in the DSLR via USB, turn it on, and check that it is recognized by gphoto2:
gphoto2 --capabilities
You’re hoping to see a response that includes Preview (live video from the camera)
You can capture some video to a local file to verify that everything is working so far:
gphoto2 --stdout --capture-movie > movie.mp4
Next, the v4l2loopback kernel module needs to be enabled. Run this command, or add it to /etc/local.rc to avoid needing to run it every time the machine boots up:
modprobe v4l2loopback
With that out of the way, change the previous command for gphoto2 capture so that it pipes the raw video feed into ffmpeg instead (which will itself create the virtual device):
gphoto2 --stdout --capture-movie | ffmpeg -i - -vcodec rawvideo -pix_fmt yuv420p -threads 0 -f v4l2 /dev/video0
I had seen older posts using gstreamer, but couldn’t get it working properly. Part of the problem is that many command-line options have changed as gstream transitioned from version 0.1 to 1.0, which is why I ended up using ffmepg instead (which has a relatively stable command-line interface). Even still, the exact command may vary in some places; if your camera is using a different color mode, that needs to be specified instead of yuv420p. If there’s already a webcam attached to your computer, the device name may be different as well (likely, the first device will be video0, the next will be video1, etc).
Now every application should see your DSLR as a normal webcam. Open up cheese to check that it’s working.
Building the Photo Booth
Once this camera setup was complete, integration into the existing photobooth app was easy. In anticipation of switching to a higher resolution feed, the app had been rewritten from the old client-side javascript version to use C++ and OpenFrameworks instead. Since the camera was being treated up as a normal webcam device, the built-in class ofVideoGrabber was all that was needed; the OpenFrameworks app didn’t even realize it was using a high-quality DSLR. This separation made development of the code much easier, it could be written and tested using a normal webcam, with the DSLR switched in for the real thing.
The hardware for the Giffinator is a Gigabyte Brix computer, running Ubuntu Linux. Also included is a Teensy microcontroller, a strip of WS2812 NeoPixel addressable LEDs, and a controllable power strip for external flash lighting. The only user control is a single stomp switch sitting on the ground, which connects to the Teensy. When pressed, it instructs the Teensy to send a keypress to the main computer (triggering the OpenFrameworks app to begin filming), and also activates lighting animations on the LED strips inside the enclosure, as well as the flash lighting to properly illuminate the recorded images. Controlled lighting has two huge benefits: the bulbs get to rest when not in use, and people using the booth understand exactly at what time they’re supposed to be acting out.
The results turned out great! Everyone at the Weird Wedding had a blast, and we’re really excited to see where we get to show it off next!


Leave a Reply